 Only for administrators with server access
This functionality should only be used if you also have access to the extension and the (generated) XLF files on the server, as changes cannot usually be made from the TYPO3 backend.
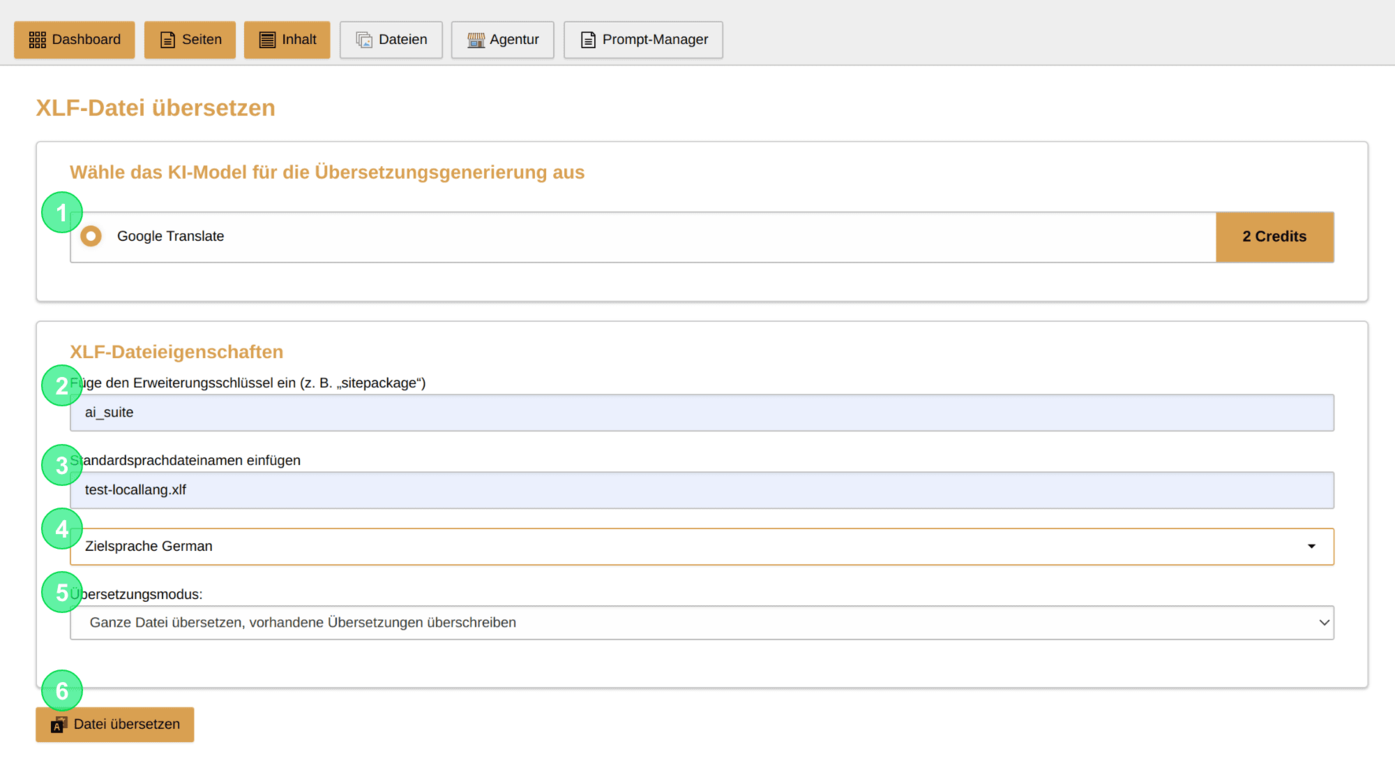
2. Structure of the initial input mask
- Select the desired model for your translation of the XLF file
- Enter the extension key of the extension where your XLF file is stored
- Select the name of your XLF file
- Choose your target language
- Decide whether the whole file or only the missing translations should be generated
- Start your translation
 XLF files in standard paths
Currently, only XLF files that are stored in the standard path "Resources/Private/Language/" within the respective extension can be translated.

3. Validate the Results
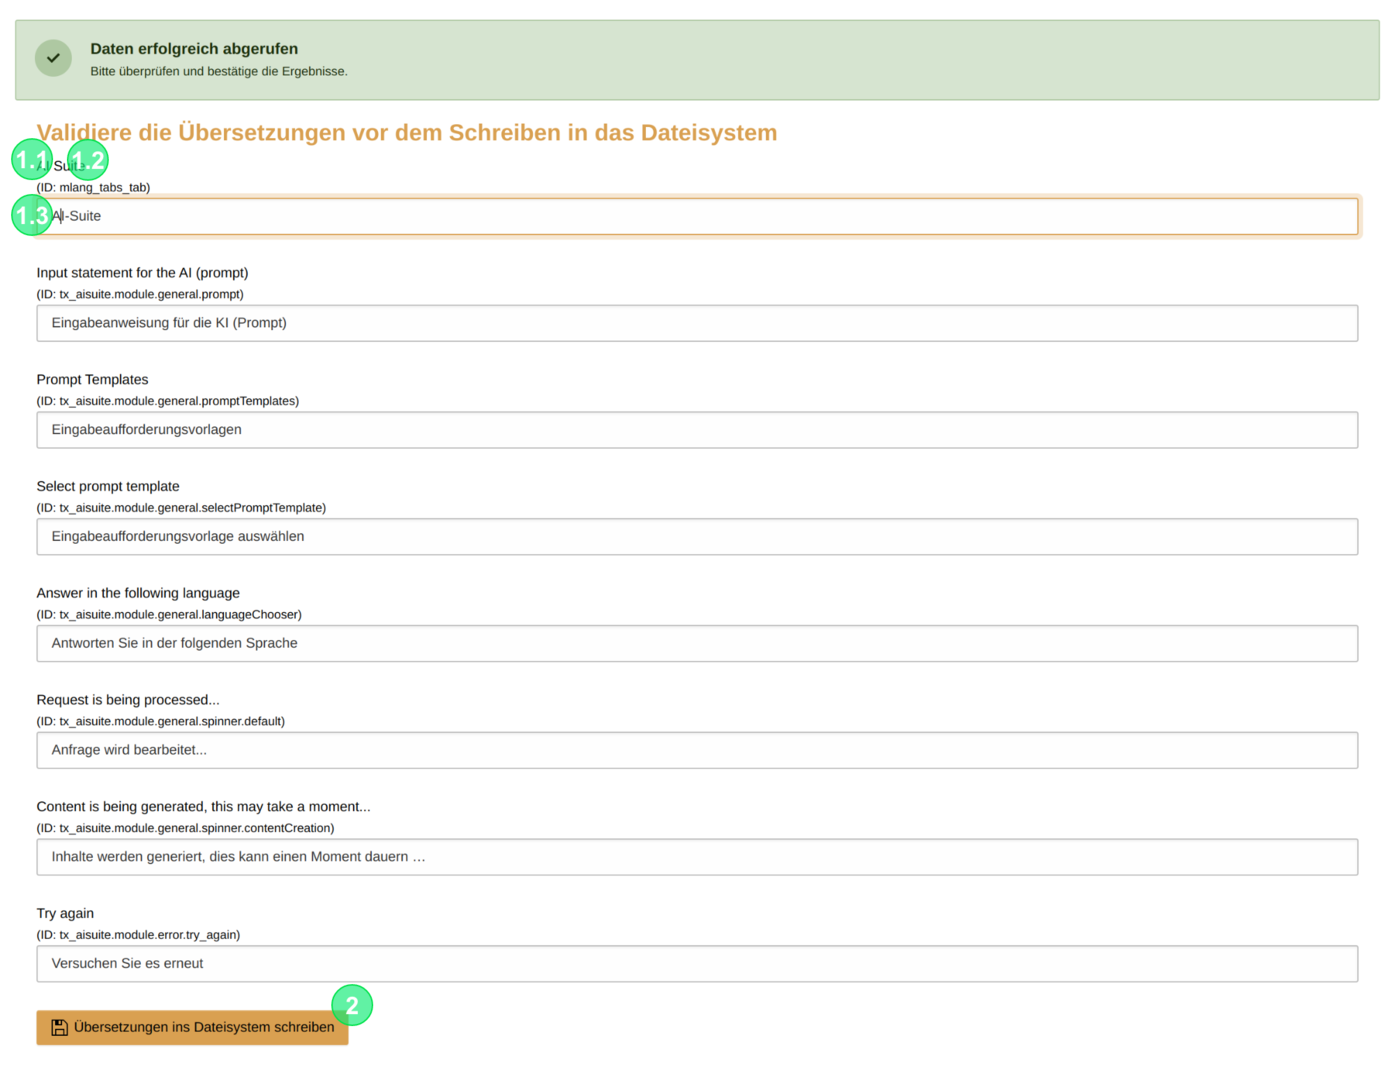
After the translations have been created, you can now validate the results and make the necessary adjustments.
The validation mask is structured as follows:
- Translation Labels
- Label in the source language as a heading
- ID of the label in parentheses
- Generated translation with the possibility of editing
- Saving the XLF file


